The DIY home decor market is expected to hit $863 billion by 2028. This shows how people love to make their homes unique. A cozy DIY nook is a big part of this trend. It’s a place for relaxation and reading, made with comfy seats, soft lights, and cozy stuff.
Think about having a quiet spot in your home where you can relax and recharge. That’s what a DIY cozy nook offers. About 70% of DIY fans do it for relaxation and mental health. Adding a cozy reading corner to your space can make reading even better.
Creating a cozy DIY nook can help you focus better, feel less stressed, and sleep better. It’s a key part of a relaxing home space. With home accessories market growing 15% a year, finding the right items for your cozy corner is easier than ever.
The Appeal of a DIY Cozy Nook
Building a diy reading retreat can greatly improve your mental health. With 70% of adults wanting their own personal space at home, it’s clear many are drawn to cozy nooks. A comfortable diy nook offers a peaceful escape, letting you relax and refresh.
A diy snug space can be made just for you, with plants, soft lighting, and cozy seats. Surveys show 85% of people add plants for better mood and air. Also, 45% like soft lighting, mixing lamps with natural light.
- Reduced stress and improved mental health
- Increased creativity and productivity
- Improved mood and overall sense of well-being
By understanding the appeal of a DIY cozy nook, you can create a space that meets your unique needs. It will be your perfect retreat from daily stress.
Choose the Perfect Location in Your Home
Creating a cozy corner crafts space starts with the right location. Look for a quiet, comfy spot with good natural light and low noise. A homemade cozy nook should be a place to relax and calm down.
When picking the perfect spot, think about:
- How close it is to other living areas
- The amount of natural light and air flow
- The noise level and distractions
- Access to power outlets and storage
Considering these points helps make a cozy corner crafts space that fits your needs. A good DIY nook is both useful and comfy. With some planning and creativity, any home spot can become a homemade cozy nook you’ll enjoy.

So, take your time and try different spots until you find the best one. With patience and effort, you can make a homemade cozy nook that’s a peaceful escape from daily life.
Essential Elements of a Comfortable Reading Corner
To make a cozy reading corner, mix the right elements for a welcoming space. Think about lighting, seating, and storage. These key parts will make your area both comfy and useful.
A good reading corner needs comfy seats, like a chair with an ottoman or a recliner. Good lighting is also key, with natural light and lamps. Studies show 65% of readers love natural light, showing how important windows are.
Lighting Considerations
Lighting sets the mood of your reading area. Natural light is best, but artificial lights are needed at night or on cloudy days. Use floor or table lamps to soften the light and warm the space.
Seating Options
Choosing the right seat is crucial for a cozy nook. Chairs with ottomans, recliners, and chaises are top picks for comfort. Also, think about sofas and chaise loungers for their comfort and guest seating.

Storage Solutions
Adding storage like shelves or bookcases improves both looks and organization. Use creative storage, like baskets for books, to keep things neat and within reach.
With these elements, you can craft a cozy nook that’s both practical and comfy. Add your personal touch with decor, like vintage bookends or favorite throws, to make it truly yours.
Plann Your Space: Measurements and Layout
Creating a diy reading retreat requires careful planning. Start by measuring the area for your comfortable diy nook. Think about the room’s dimensions, door and window locations, and natural light. Use online tools or get advice from a pro to find the best layout.
A well-thought-out diy reading retreat can greatly enhance your space. Here are some tips to remember:
- Choose a quiet and cozy spot, away from busy areas
- Consider furniture size and shape, and ensure enough room to move
- Think about lighting, using table, floor lamps, and string lights for a warm feel

By carefully planning your space, you can craft a comfortable diy nook that suits you. Remember to measure, plan the layout, and pick the right furniture and lighting. With creativity and planning, you can build a diy reading retreat for relaxing and unwinding.
Must-Have Materials for Your DIY Cozy Nook
Creating a cozy nook starts with picking the right materials. You’ll need wood, fabric, and pillows to build it. These basics will set the stage for your cozy corner.
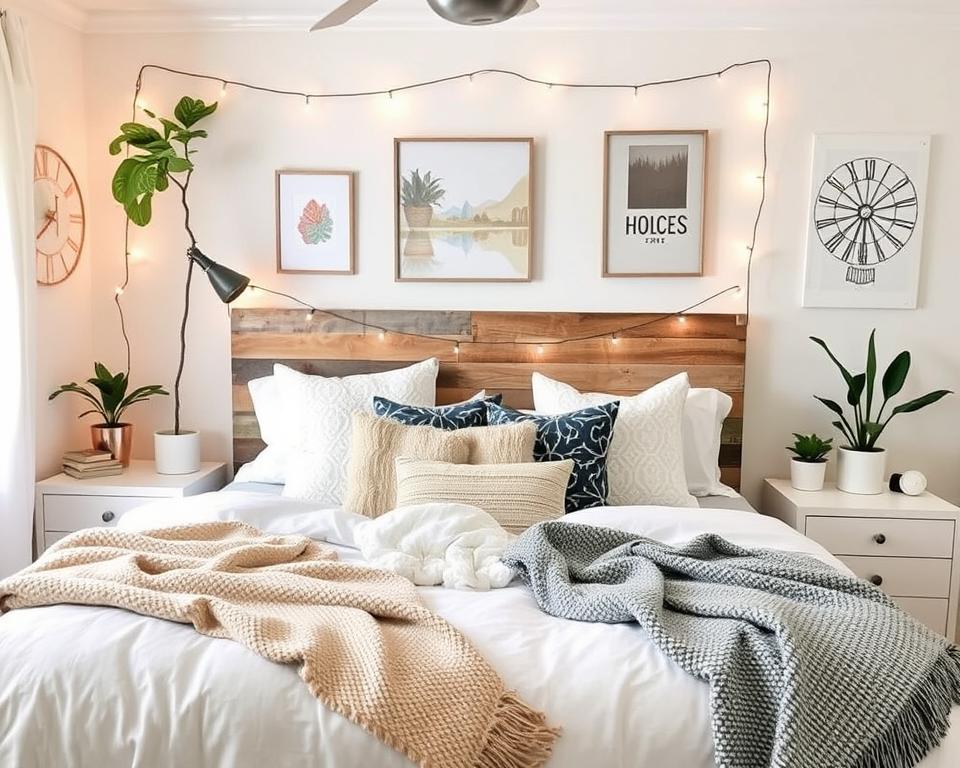
For comfort, choose soft materials like tumbled linen or velvet. Soft lighting, like table lamps or string lights, adds warmth. Plus, indoor plants can make your space feel more relaxing.

Decorating your nook is where you can get creative. Add handmade pillows, blankets, or wall art for a personal touch. Natural materials like wood or stone bring warmth and texture. These elements help make your nook a perfect spot for relaxation and reading.
Some great items for a cozy nook include:
- Plush throw blankets
- Cozy pillows and cushions
- Soft lighting fixtures
- Indoor plants and greenery
- Handmade wall art and crafts
The secret to a cozy nook is focusing on comfort and warmth. With the right materials and decor, you’ll have a snug space for unwinding and reading.
Step-by-Step Construction Guide
Creating a cozy nook is a fantastic way to transform a corner of your home into a relaxing, functional, and stylish space. This step-by-step guide will walk you through the process, from materials to assembly.
Materials Needed:
- (2) 4′ x 8′ Sheets of Maple Furniture-Grade Plywood (for structure and storage).
- Wood Glue (for strong joints).
- Wood Screws (for secure assembly).
- Sandpaper (Medium and Fine Grit, for smooth surfaces).
- Wood Stain or Paint (optional, for finishing).
- Cushions and Upholstery Fabric (for added comfort).
- Measuring Tape and Pencil (for precise measurements).
- Angle Finder or Protractor (for seat back angle).
- Circular Saw or Table Saw (for cutting plywood).
- Clamps (for holding pieces together during assembly).
Cut List:
From the plywood sheets, cut the following pieces:
- Side Panels: 2 pieces at 18″ x 55″
- Seat Bottom: 1 piece at 14″ x 53 1/2″
- Side Dividers: 2 pieces at 18″ x 18″
- Book Cubby Dividers: 6 pieces at 14″ x 18″
- Top Trim: 2 pieces at 4″ x 18″
Step 1: Plan Your Nook Design
- Sketch Your Layout:
- Visualize the nook in your space.
- Include the seat, angled backrest, and book cubbies.
- Understand Key Dimensions:
- Seat backrests are angled at 37 degrees.
- Center dividers are 9 inches from the back of the seat backs.
- Each book cubby is approximately 18 inches wide.
Step 2: Cut the Plywood
- Mark the Measurements:
- Use a pencil and measuring tape to mark cuts on the plywood sheets.
- Cut the Pieces:
- Use a circular saw or table saw for straight and precise cuts.
- Sand all edges after cutting to ensure smooth surfaces.
Step 3: Create Half-Lap Joints
- Mark the Joints:
- Half-lap joints are located 7 inches from the back of the seat backs, aligning with the center dividers.
- Mark the areas to be cut on each panel for a snug fit.
- Cut the Joints:
- Use a saw or router to cut halfway through the thickness of the wood.
- Test the Fit:
- Assemble the pieces temporarily to ensure the joints fit securely.

Step 4: Assemble the Structure
- Attach the Side Panels:
- Use wood screws and wood glue to attach the 18″ x 55″ side panels to the 14″ x 53 1/2″ seat bottom.
- Add the Dividers:
- Install the 18″ x 18″ side dividers and the 14″ x 18″ cubby dividers, leaving approximately 18 inches of width for each cubby.
- Use wood glue and screws for added strength.
- Secure the Backrest:
- Attach the angled backrest panels (cut to the 37-degree angle) to the seat bottom and side panels.
Step 5: Add Finishing Touches
- Sand the Structure:
- Sand the entire piece with fine-grit sandpaper for a smooth finish.
- Paint or Stain:
- Apply paint or wood stain to match your room’s decor. Allow it to dry completely.
- Attach Top Trim:
- Secure the 4″ x 18″ trim pieces to the top edges for a polished look.
Step 6: Add Comfort and Style
- Install Cushions:
- Add seat and backrest cushions for comfort. Use fabric that complements your room’s color scheme.
- Decorate:
- Place books, baskets, or decorative items in the cubbies for functionality and aesthetic appeal.
Step 7: Test and Enjoy
- Sit in the nook to ensure it’s sturdy and comfortable.
- Make any adjustments if needed to improve stability or aesthetics.
Tips for Success:
- Double-check measurements before cutting to avoid errors.
- Use clamps while the wood glue dries for a strong bond.
- Customize the nook’s size to fit your space and storage needs.
With your DIY cozy nook complete, you now have the perfect spot to read, relax, or enjoy quiet moments. It’s a beautiful and functional addition to any home!

When building your homemade relaxation space, choose furniture that suits your needs. Consider a 17-inch Modern Square Ottoman or a Classic Barrel Swivel Chair. Add personality and structure to your design. You can also use wallpaper as an accent wall to make your diy cozy nook look great.
By following these steps and using the right materials, you can make a cozy and inviting homemade relaxation space. With patience and creativity, you can turn your diy cozy nook into the perfect place to relax and escape daily stress.
Add Personal Touches to Your Reading Retreat
Creating your own reading retreat is all about adding personal touches. It’s not just about the physical stuff, but the emotional connection you feel. By adding your own style, you make it a special place to escape daily stress.
Think about the colors and textures you love. Do you like warm tones or bright colors? Pick a color scheme that shows your mood and personality. Use it in pillows, blankets, and wall decor. Add textures like plush rugs and soft blankets for a cozy feel.

Also, add things that show your interests. If you love reading, add a bookshelf or a reading lamp. For nature lovers, include plants or fresh flowers. Personal items like family photos or special objects make it even more meaningful.
Creating a Unique and Inviting Space
Personal touches make your reading retreat special and welcoming. Here are some ideas:
- Get a unique piece of furniture, like a vintage armchair or colorful ottoman.
- Use natural elements, like a vase with branches or a bowl of river rocks.
- Make a gallery wall with personal photos and artwork.
- Add a cozy throw blanket or plush rug.
Remember, make it your own. Experiment with different ideas until you find the perfect mix. This will make your space feel relaxing and inspiring.
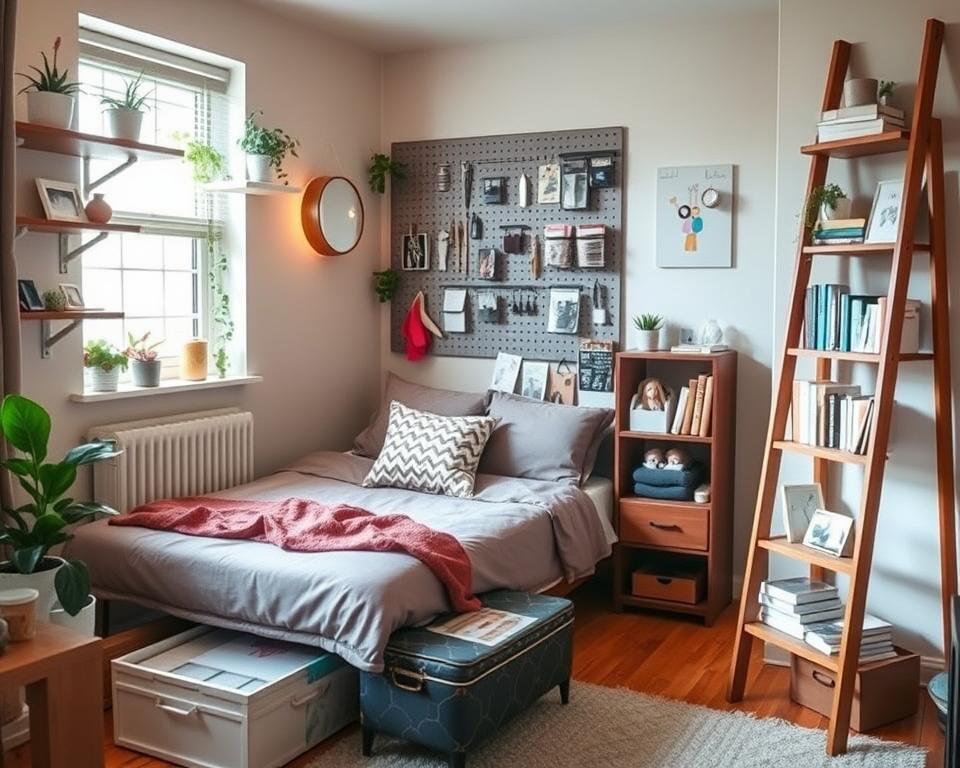
Maximize Comfort in Small Spaces
Creating a cozy nook in a small space is all about using every inch wisely. With 85% of city dwellers looking to make the most of their space, small homes are common. Use furniture that does more than one thing and vertical storage to keep things tidy and easy to find.
A cozy nook can make your home feel more comfortable and useful. A survey found that 78% of homeowners think a cozy reading spot is key. Soft lighting can cut eye strain by half, and adding pillows and throws can make a space feel up to 70% cozier.
Here are some ways to make small spaces more comfortable:
- Use vertical storage to keep things organized
- Choose furniture that serves more than one purpose
- Add plants to boost mood and productivity by up to 15%
- Use soft furnishings like cushions and throws to reduce noise by 20-30%

By following these tips, you can craft a cozy nook that suits your style and needs. It’s a great place to escape daily stress. Make sure to include natural light and get creative with your crafts to make it truly special.
Seasonal Updates for Your Homemade Relaxation Space
Enjoying your homemade cozy nook? Think about making seasonal changes to keep it fresh. A diy relaxing hideaway is a space that changes with the seasons. It meets your needs and tastes all year round.
Seasonal updates can be fun. For winter, add warm textiles like throw blankets and pillows. In summer, go for light and bright elements like sheer curtains and natural rugs.
Summer Refresh Ideas
For summer, refresh your space with a few easy steps. Add greenery like potted plants or a living wall for a natural vibe. Use cool colors like blues and whites to feel serene.
Winter Coziness Tips
In winter, make your nook cozy with warm elements. Soft blankets, favorite books, and a warm drink like hot chocolate or tea are great. They bring comfort and relaxation.

Seasonal updates make your diy relaxing hideaway perfect for any time of year. Whether you want warmth in winter or coolness in summer, your nook can be a welcoming retreat. It supports your well-being and relaxation all year.
DIY Cozy Nook Tips
Creating a cozy nook can be a rewarding project, providing a personal retreat for relaxation, reading, or simply unwinding. Here are some essential tips to ensure your DIY cozy nook is functional, comfortable, and visually appealing.

1. Choose the Right Location
- Find a Quiet Spot: Select a corner or area with minimal foot traffic for privacy.
- Consider Natural Light: If possible, place the nook near a window for natural lighting and a calming view.
- Use Unused Spaces: Transform underutilized areas, such as under a staircase, a corner in the living room, or a wide hallway.
2. Optimize Space and Functionality
- Measure Your Area: Take accurate measurements to ensure the nook fits perfectly within your chosen space.
- Incorporate Storage: Add book cubbies, built-in shelves, or storage drawers to maximize functionality.
- Customize Dimensions: Adjust the size of your nook to suit your space and the activities you plan to do there.
3. Select Comfortable Materials
- Choose Quality Wood: Opt for furniture-grade plywood, MDF, or solid wood for durability and aesthetics.
- Add Cushions: Use thick foam cushions covered with soft, durable fabric to make the seating area inviting.
- Layer Textiles: Include throw pillows, blankets, or a soft rug for a layered, cozy feel.
4. Focus on Design and Aesthetics
- Pick a Theme: Match the nook’s design with your home decor, whether modern, rustic, minimalist, or bohemian.
- Use Neutral Colors: Soft, neutral tones create a calming environment.
- Add Personal Touches: Decorate with artwork, photos, or a small lamp to make the nook uniquely yours.

5. Lighting Matters
- Natural Light: Position your nook to make the most of sunlight for daytime use.
- Layered Lighting: Add a warm, adjustable lamp or string lights for a cozy evening atmosphere.
- Task Lighting: Use focused lights like reading lamps if the nook will primarily be for studying or reading.
6. Ensure Structural Integrity
- Use Strong Joints: Reinforce your structure with screws, wood glue, and brackets for stability.
- Secure Attachments: If the nook includes shelves or cubbies, ensure they are firmly fixed to prevent accidents.
- Weight Capacity: Test the weight-bearing capacity of the seat and shelves to ensure safety.
7. Make It Multifunctional
- Incorporate Flexibility: Design the nook for multiple uses, such as reading, studying, or working on a laptop.
- Add Foldable Features: Consider fold-away tabletops or collapsible shelves for added functionality.
- Adapt for Growth: If the nook is for children, design it to be adaptable as they grow.
8. Don’t Forget Practical Details
- Cable Management: If the nook includes a lamp or charging station, add cable clips or a small outlet strip for neatness.
- Ventilation: Avoid completely enclosing the space to allow airflow.
- Wall Protection: Use rubber pads or bumpers to prevent scratches if the structure leans against the wall.
9. Test and Refine
- Comfort Check: Sit in the nook and test the backrest angle, seating height, and cushion firmness.
- Functionality: Ensure the storage compartments and any folding features work smoothly.
- Aesthetic Appeal: Step back and evaluate if the nook blends well with the room’s overall design.
10. Add Greenery and Decor
- Small Plants: Add potted plants or succulents to create a fresh, calming environment.
- Books and Magazines: Fill the cubbies with your favorite reads for easy access.
- Decorative Accents: Include candles, vases, or other decor items that match your theme.
By incorporating these DIY projects, you can create a cozy reading corner that invites you to relax, unwind, and enjoy your favorite books. Whether you choose to build a bookshelf, create a comfortable seating area, add warm lighting, or choose a calming color scheme, the result will be a homemade relaxation space that you can cherish for years to come.

Source Links
- Easy How To Create a Cozy Book Nook – https://thecitycottage.com/easy-how-to-create-book-nooks/
- No title found – https://scentsyblog.com/home-decor/create-your-own-book-nook/
- Blog-Happy Highly Sensitive Life – https://www.happyhighlysensitivelife.com/blog/diy-cozy-book-nook-highly-sensitive-person-hsp
- Why Every Home Needs a Cozy Reading Nook in 2025 – https://www.zoocasa.com/blog/cozy-reading-nook-benefits/
- How to Create the Perfect Cozy Reading Nook — Blog — Design Confetti – https://designconfetti.com/new-blog/how-to-create-the-perfect-cozy-reading-nook
- How to Create a Cozy Reading Nook in Your Home – https://shabbyfufu.com/cozy-reading-nook-ideas/
- The Ultimate Guide to Creating the Perfect Reading Nook – Bear’s Furniture – Greenville Furniture & Mattress Store – https://bearsfurniture.com/ultimate-guide-creating-perfect-reading-nook/
- How To Create A Cozy Reading Nook In 8 Steps – Edward George – https://edwardgeorgelondon.com/escape-into-your-cozy-reading-haven-learn-the-expert-tips-and-tricks-for-creating-the-perfect-reading-nook-in-your-home/
- 25 Cozy Reading Nook Ideas for Even the Smallest Spaces – https://www.oprahdaily.com/life/g34498884/reading-nook-ideas/
- How to Create a Cozy Reading Nook on a Budget – Week 5 of the One Room Challenge – Willow Bloom Home – https://www.willowbloomhomeblog.com/how-to-create-a-cozy-reading-nook-on-a-budget-week-5-of-the-one-room-challenge/
- Cozy Reading Den DIY | Book Nook — Whimsies of a Nerd Girl – https://www.whimsiesofanerdgirl.com/diy/cozy-reading-den-diy-book-nook
- How to Create a Cozy Nook – https://www.frenchcountrycottage.net/how-to-create-a-cozy-nook-to-rejuvenate/
- 30 Reading Nook Ideas for the Ultimate Cozy Hideaway – https://www.bhg.com/reading-nook-ideas-7504872
- How to Build an Awesome Reading Nook With Book Storage. – https://www.instructables.com/How-to-Build-a-Awesome-Reading-Nook-With-Book-Stor/
- How to Create a Cozy Reading Nook in Your Bedroom // This is our Bliss – https://thisisourbliss.com/2022/10/27/how-to-create-a-cozy-reading-nook-in-your-bedroom/
- Create a Cozy Reading Nook You’ll Never Want to Leave – https://whimsicalconnotations.com/2024/12/08/create-a-cozy-reading-nook-youll-never-want-to-leave/
- Create a Cozy Reading Nook: Your Ultimate Guide to a Perfect Literary Experience – The Colony – https://www.colonytx.com/create-a-cozy-reading-nook-your-ultimate-guide-to-a-perfect-literary-experience/
- Embrace Comfort: 9 Frugal Hacks for Crafting a Cozy Reading Nook – https://www.artsandclassy.com/embrace-comfort-9-frugal-hacks-for-crafting-a-cozy-reading-nook/
- How to Create a Cozy Reading Nook in Any Home (Even a Tiny Apartment) — My Moonstone Kitchen – https://mymoonstonekitchen.com/blog/how-to-create-a-cozy-reading-nook-in-any-home
- My Cozy Bohemian Reading Corner — My Moonstone Kitchen – https://mymoonstonekitchen.com/blog/my-cozy-bohemian-reading-corner
- 37 Cozy Reading Nook Ideas for Whiling Away the Afternoon – https://www.countryliving.com/home-design/decorating-ideas/g1660/reading-nooks/
- How to Create a Cozy Reading Nook in Your Home? – https://www.autonomous.ai/ourblog/create-a-cozy-reading-nook-in-your-home
- How to Create the Perfect Cozy Reading Corner in Your Home – https://www.frostbeardstudio.com/blogs/news/how-to-create-the-perfect-cozy-reading-corner-in-your-home?srsltid=AfmBOopLPuKXFelWeKGpGqIOxMG5xrvyYWPqGjsFGSi7P_5U0QjS4N9S
- Create a Cozy Reading Nook: DIY Ideas for Bookworms – https://vocal.media/poets/create-a-cozy-reading-nook-diy-ideas-for-bookworms